It has a golden brown outside crust and inside it, so tender and buttery. To make a brioche dough it is an enriched yeast bread which means lots of batter and lots of eggs. We have to knead the dough for a long time close to 25 minutes hence use an electric mixer. Start with the paddle attachment. Place the all-purpose flour unbleached, kosher salt SAF gold instant yeast( you don’t have to prove it gives a good rise to bread in the bowl of your mix everything together in the electric mixer. Beat until combined. Add cold eggs and cold milk and beat until the ingredients mix together.
The ingredients are cold to help the dough to be at room temperature. Replace the paddle attachment with the dough hook, and knead the dough on 1st speed for four minutes. Increase your mixer speed to 2nd speed, and continue to knead the dough for another three minutes. Next, with the mixer on 2nd speed, gradually add the granulated sugar over five minutes. Place the cold unsalted butter between two sheets of parchment or wax paper. With a rolling pin, pound the butter until it’s pliable but still cold. Cut the butter into pieces and add them to the dough. Knead the dough, on 2nd speed, for another 10 to 15 minutes or until the dough clears the bowl and is smooth (not sticky) and elastic.
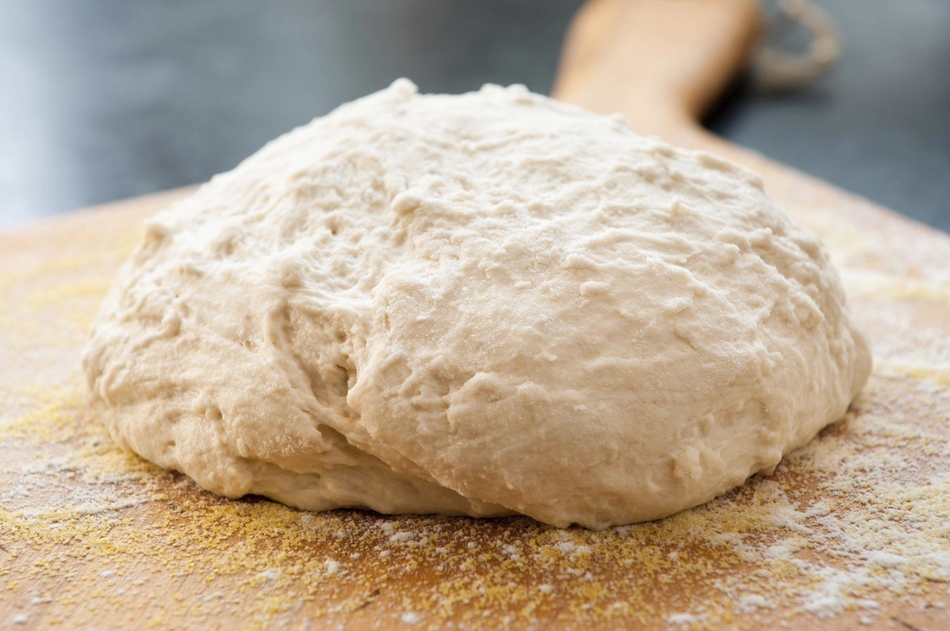
To check to see if the dough is fully kneaded, use the ‘windowpane’ test. To do this, start with little dough. Gently stretch it. For the fully kneaded dough, you should be able to stretch the dough quite thin, without it tearing so that you can almost see through it. Place your dough in a large, lightly oiled bowl (with flavorless oil using paper towel oil the bowl), cover with plastic wrap, and let sit at room temperature for about 1 hour. If your kitchen is cold you can leave it in the oven so as to make sure the dough is at room temperature. After 30 minutes you need to stretch the dough to equalize its temperature and it also helps to strengthen the dough.
To stretch the dough, gently take one edge of the dough and stretch it and then fold it onto the top of the dough. Turn your bowl 180 degrees and stretch the dough in the same way. Then turn your bowl 90 degrees and stretch the dough in the same way. Then turn your bowl 180 degrees and repeat the process. After that flip your dough so the bottom is now the top, and cover. Let proof another 30 minutes and then place the covered dough in the refrigerator to chill overnight. This improves the flavor of the Brioche and also makes the dough much easier to shape and also.
Next morning, line a baking sheet with parchment paper. Then remove the dough from the refrigerator and divide it into equal-sized pieces. Then, flour your hands and work with one piece of dough at a time, flatten into a round. Take the edges of the dough and fold them into the center and gently seal. Then flip your dough over so the smooth side is facing up. With the palm of your hand rotate the ball of dough on your surface to create surface tension and to seal the edges of the dough completely. Do the same for the rest of the dough.
Place the rounds of the dough on your baking sheet, spacing them several inches apart. Cover loosely with plastic wrap that has been sprayed with a non-stick spray or lightly oiled (this will prevent the buns from sticking to the plastic wrap) and let proof at room temperature until nice and puffy and almost doubled in size. Since the dough is very cold, this could take about 2 1/2 hours.
Next, preheat your oven to 350 degrees F. When ready to bake, remove the plastic wrap and, with a pastry brush, lightly brush the tops of the Brioche with the beaten egg (in a bowl using a whisk beat the eggs). Sprinkle the tops with sesame seeds (optional). Place in the preheated oven and bake for about 20 minutes or until golden brown and shiny.
If you tap the bread it will sound hollow. Rotate the pan front to back about halfway through baking. Remove from oven and place on a wire rack to cool for about five minutes before transferring to a wire rack to cool completely. They can be covered and stored for several days or they can be frozen. Or serve them with soup.
Ingredients;
- 3 1/4 cups (425 grams) unbleached all-purpose flour
- 1 1/2 teaspoons (5 grams) SAF Gold Instant Yeast Available on Amazon
- 2 teaspoons (8 grams) kosher salt
- 5 large cold eggs (240 grams)
- 3 tablespoons (40 grams) cold milk (whole or reduced-fat)
- 1/3 cup (65 grams) granulated white sugar
- 1 cup (225 grams) cold unsalted butter
Glaze:
- 1 large egg, lightly beaten
- Sesame Seeds (optional)
Instructions;
- Place the flour, yeast, and salt in the bowl of your electric stand mixer, fitted with the paddle attachment. Beat until combined. Add the eggs and milk and beat until combined.
- Replace the paddle attachment with the dough hook, and knead the dough on 1st speed for four minutes. Increase your mixer speed to 2nd speed, and continue to knead the dough for another three minutes. Next, with the mixer on 2nd speed, gradually add the sugar over five minutes.
- Place the cold butter between two sheets of parchment or wax paper. With a rolling pin, pound the butter until it’s pliable but still cold.
- Cut the butter into pieces and add them to the dough. Knead the dough, on 2nd speed, for another 10 to 15 minutes or until the dough clears the bowl and is smooth (not sticky) and elastic.
- To check to see if the dough is fully kneaded, use the ‘windowpane’ test. To do this, start with a small fistful of dough. Gently stretch it. For a fully kneaded dough, you should be able to stretch the dough quite thin, without it tearing so that you can almost see through it.
- Place your dough in a large, lightly oiled bowl, cover with plastic wrap, and let sit at room temperature 73 – 76 degree F) (23 – 24 degree C) for about 1 hour.
- After 30 minutes you need to stretch the dough to equalize its temperature and it also helps to strengthen the dough. To stretch the dough, gently take one edge of the dough and stretch it and then fold it onto the top of the dough.
- Turn your bowl 180 degrees and stretch the dough in the same way. Then turn your bowl a quarter-turn (90 degrees) and stretch the dough in the same way. Then turn your bowl 180 degrees and repeat the process. After that flip your dough so the bottom is now the top, and cover. Let proof another 30 minutes and then place the covered dough in the refrigerator to chill overnight. (This makes the dough much easier to shape and also improves the flavor of the Brioche.)
- Next morning, line a baking sheet with parchment paper then remove the dough from the refrigerator and divide it into 8 equal-sized pieces (about 125 grams each). Then, working with one piece of dough at a time, flatten into a round.
- Take the edges of the dough and fold them into the center and gently seal. Then flip your dough over so the smooth side is facing up. With the palm of your hand rotate the ball of dough on your surface to create surface tension and to seal the edges of the dough completely.
- Place the rounds of the dough on your baking sheet, spacing them several inches apart. Cover loosely with plastic wrap that has been sprayed with a nonstick spray or lightly oiled (this will prevent the buns from sticking to the plastic wrap) and let proof at room temperature (about 73 – 76 degree F) (23 – 24 degree C) until nice and puffy and almost doubled in size (because the dough is very cold, this could take about 2 1/2 hours).
- Next, preheat your oven to 350 degrees F (180 degrees C) with the oven rack in the center of the oven.
- When ready to bake, remove the plastic wrap and, with a pastry brush, lightly brush the tops of the Brioche with the beaten egg. If desired, sprinkle the tops with sesame seeds.
- Place in the preheated oven and bake for about 20 minutes or until golden brown and shiny. If you tap the bread it will sound hollow. Rotate the pan front to back about halfway through baking. (Internal temperature of a fully baked Brioche should be about 190 degree F (88 degrees C)).
- Remove from oven and place on a wire rack to cool for about five minutes before transferring to a wire rack to cool completely. It can be covered and stored for several days or they can be frozen.